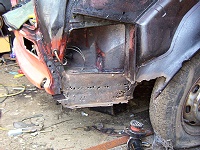
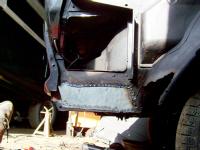
Rear Right Side Inner Wing
|
When I took the wire brush to this, a large number of holes appeared and the panel below the air box intake was obviously thin and would have to be cut out.
|
|
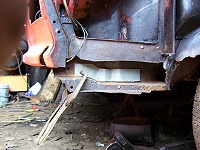
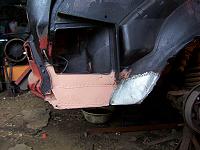
This revealed more damage – this is the rear bumper mounting bracket and will take some of the load from the tow bar later, so will need to be made good.
|

|
|
The first cut and trial fit, you would not believe how many folds even this small piece needed!
|
|
After welding it all up with a combination of the spot and mig welding, a coat of primer to try and keep more rust away.
|
|

|
Then I start to attach the outer patch. The jaws of the spot welder just reached inside the box, but not quite to the very front. I had to finish that with the mig.
|
|
A clamp is attached to the far corner whilst I start spot welding along the bottom edge towards the clamp.
|
|
|
And the job is soon finished! It just needs a coat of primer.
|
I started the next stage after a good night’s rest, so I had a clear, fresh head. I had been looking at it the previous evening and wondering just how I was going to manage it. It looked impossible!
|
I had to deal with the inner wing liner. Here I have cut the basic shape of the missing portion of the wing and am sizing it up.
|

|
|
Like so much of this car, this is curved in two dimensions and it took a bit of imagination to work out its proper shape. It took me a couple of hours to reach this stage and to start the welding.
|
|
A view of the underside during the fitting work. You can see the remains of part of the old edging on the left which helped to guide me with the shape.
|
|

|
And the underside after all the welding had been completed. I had cut away the old edging, it was of no structural use and would only rust away and cause trouble later if I tried to keep it.
|
|
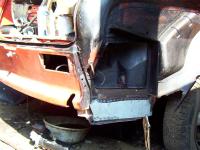
And finally, and extra “ear” which will take one of the screws to attach the outer wing later. As for the other side, I will need to drill a hole later to take the speed nut.
|

|

|
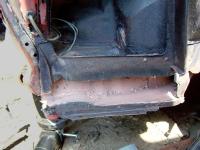
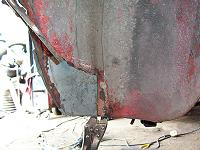
Astute readers will note that I have not replaced the intermediate divider plate. I thought it was only a dirt trap – which it was. However, it seems to have also acted as a sort of baffle and a drain pipe terminated at it as can be seen here. I think I will simply extend that when the time comes! This, of course, applies to both sides.
|
|
Here it is after two coats of light blue Hammerite. I will also paint the inside of the airbox and the engine bay to match. You can see part of it here where I have painted it.
|
|
Return to Inner Wings index